Category: Personal Care Blog

I blog about personal care including hair removal, skin care, nail care, and hair care.

  • Can You Use Nair on Your Face?

    Can You Use Nair on Your Face?

    I’ve tried nearly every hair removal method in the world by now and this has included Nair hair removal cream. It has served me well at various stages of life, which I’ve talked about in the past. This has lead to many reader questions about using Nair on the face.

    So can you use Nair on your face? Nair hair removal cream can be used on the face. It’s best to only use it on the chin, upper lip, and cheeks. Avoid the eyes and mouth. And make sure that you are using a product designed for the face, such as Nair Face Cream.

    So you can use Nair on the face. But Nair isn’t right for everybody. Read on to learn the pros and cons of using Nair on your face.

    Pro #1: Super Soft and Smooth Skin

    Depilatory creams like Nair dissolve hairs both above the skin and below it, close to the root. So unlike with shaving, they tend to grow back thinner, with softer tips, and you don’t get that sharp kind of stubble that shaving causes.

    Nair also has added ingredients that tend to soften the skin, leaving a super smooth dewy soft appearance. It’s a great canvas for applying make up.

    Con #1: Potential Burns and Discoloration

    The chemicals in Nair can easily burn your skin if you are not super careful. This sucks on most body parts, but is even worse on the face. Not only does it hurt like a mofo, but it can leave embarassing scabs and scars.

    Also, irritation or burns from Nair can cause temporary or even permanent discoloration. This is most common for people with darker skin.

    To understand all the risks, read Hair Removal Cream Side Effects.

    Pro #2: Super Cheap

    For a facial hair removal method, Nair is about as cheap as it gets. You can buy a bottle of Nair Face Cream on Amazon for under $10 (and even cheaper if you buy in bulk). One bottle will last you months and it never expires.

    Compare this to salon waxing or threading and you are saving tons.

    Con #2: Waiting 24 Hours

    After using Nair on your face, you need to wait 24 hours to apply any products that contain perfume or your skin may become irritated. Some people need to avoid all products for up to 24 hours, including lotions and make-up.

    In addition, you should avoid the sun for 24 hours after using Nair. If you have to go out for a short while, you can probably hack it by covering up with a hat or use an umbrella or something else to keep the sun off your face. But definitely avoid a day at the beach.

    Pro #3: Pain-Free

    Unlike many other methods that remove hair by the roots, Nair doesn’t hurt. Because it’s not ripping those hair out, it’s just dissolving them. If you are super sensitive to hair removal methods like waxing, this may make Nair more appealing to you.

    Con #3: Not the Longest-Lasting Method

    Although it hurts less, hair won’t be gone as long as with other methods that remove hair from the root, like waxing, sugaring, and epilation. Instead, you’ll probably see hairs coming back within a week.

    Can You Use Nair on Eyebrows?

    Nair recommends that you do not use their creams around the eyes or eyebrows. We are talking about serious chemicals that you do not want to accidentally get into your eyes.

    Some women do use it to shape the top of their eyebrows or to remove hair from between the eyebrows (the unibrow). I would advise against doing this. However, if you are going to use it around eyebrows, those are the safest areas.

    You should totally not put it under your eyebrows. The skin there is usually too thin to handle the harsh chemicals in Nair.

    Plus, it’s really close to your eyes and eye lashes. Imagine how you’d look after dissolving half of your eyelashes off accidentally with the chemicals in Nair before you try this.

    How to Apply Nair for Face Hair Removal Cream

    1) Do a Patch Test. Apply a tiny amount of Nair to a small part of the area where you plan to use it. Follow the rest of the directions here and see how it works. Then wait 24 hours. If you don’t end up with any irritation, burns, discoloration, or other side effects, continue on with the rest of the area.

    2) Cleanse your skin with water and towel or a gentle cleanser.

    3) Carefully cover the hair with a thick, even layer of Nair, making sure that you do not rub it in.

    4) Set a timer for 3 minutes. Wait patiently. Put lid back on your container.

    5) After 3 minutes, wipe a tiny part of the cream off with a cloth and see if the hair wipes off with it. If so, wipe the rest of the cream off. If not, wait another 1-2 minutes and try again.

    6) Depending on the product you have bought, you will need to have all the cream rinsed off within a total of 5 to 10 minutes. Check your product instructions to make sure which one you have! Some creams are stronger than others and must be removed within 5 minutes. Leaving Nair on for longer may result in burns.

    7) Rinse your face thoroughly with lukewarm water. Use a soft cloth if necessary to get all residue off, but do not rub skin aggressively. Do not use any soap or other products on your face after using Nair.

    8) Pat the face dry with a soft towel.

    Tips for Using Nair on Face

    • Make sure you are using a Nair product designed for the face. In the US, you should be looking for Nair Face Cream. In the UK and other countries, they have different names. But basically, just read the label and make sure it’s for the face.
    • Using Nair incorrectly can result in irritation, burns, and discoloration, so heed carefully.
    • Don’t go in sun for 24 hours. If you must go, wear a hat, scarf, umbrella, etc to avoid facial discoloration.
    • After using Nair, wait 24 hours before you apply perfumed products or other products with harsh chemicals on the same area.
    • Avoid contact with eyes. If you get in your eyes, rinse with water immediately and call poison control or your doctor.
    • If you accidently ingest Nair, you should also call poison control
    • You shouldn’t use Nair on skin that is damaged, broken, cut, or inflamed.
    • If you feel any burning or stinging, remove the product imeedgately

    What’s the Worst that Can Happen?

    There is no shortage of horror stories on the web related to using Nair on the face. I’ve read tons of these and what I’ve found is that almost all of them could have been avoided if they had followed the directions I have listed above.

    Pretty much no one does a patch test. Which I totally get. It’s a pain and we all want instant gratification. But we are talking about your face, here, so please don’t take any short cuts!

    The second biggest mistake I see is that people are leaving Nair on too long. Never ever ever leave it on longer than recommended. Start checking after three minutes to see if hairs are dissolved and remove it as soon as possible.

    To see what can happen if you don’t heed this advice, here’s an example in this video:

    What’s the Best that Can Happen?

    If you use Nair carefully and follow all the precautions I have talked about, you will prevent any major mishaps with Nair. If your skin continues to respond positively to patch tests and using Nair, you can expect super soft and smooth skin on a super tiny hair removal budget.

    Here is an example of a woman who has used Nair successfully to look and feel more beautiful. Skip ahead to 2 minutes in to hear her thoughts on about Nair on the face:

    What I Use to Remove Facial Hair

    I used to successfully use Nair to remove body and facial hair, but I have always had lots of autoimmune issues and super sensitive skin. I began to experience mild irritation and a few burns, so decided to quit before I became more sensitive to it.

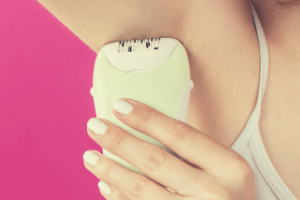
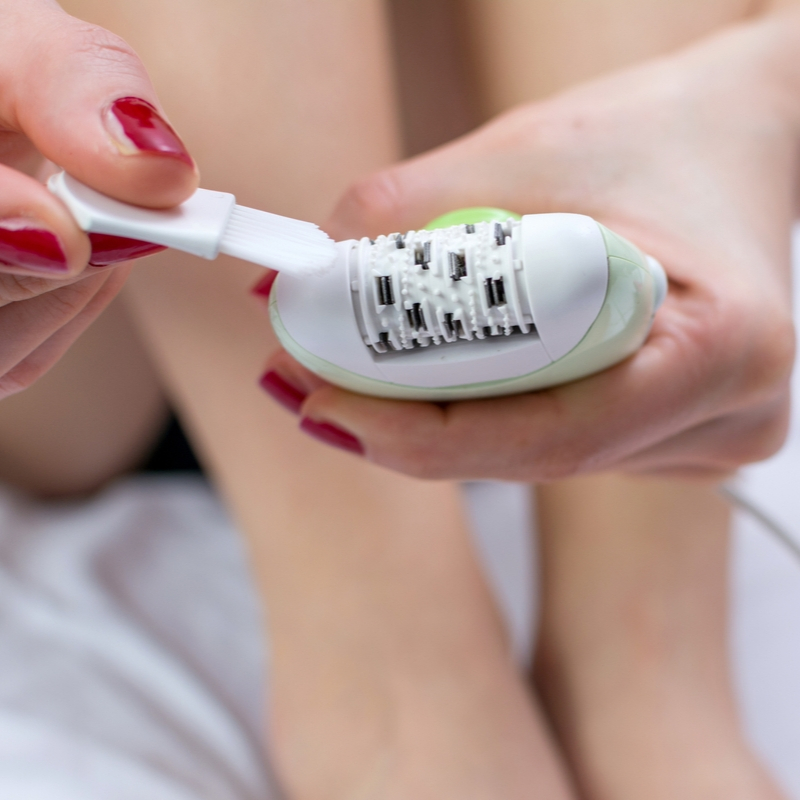
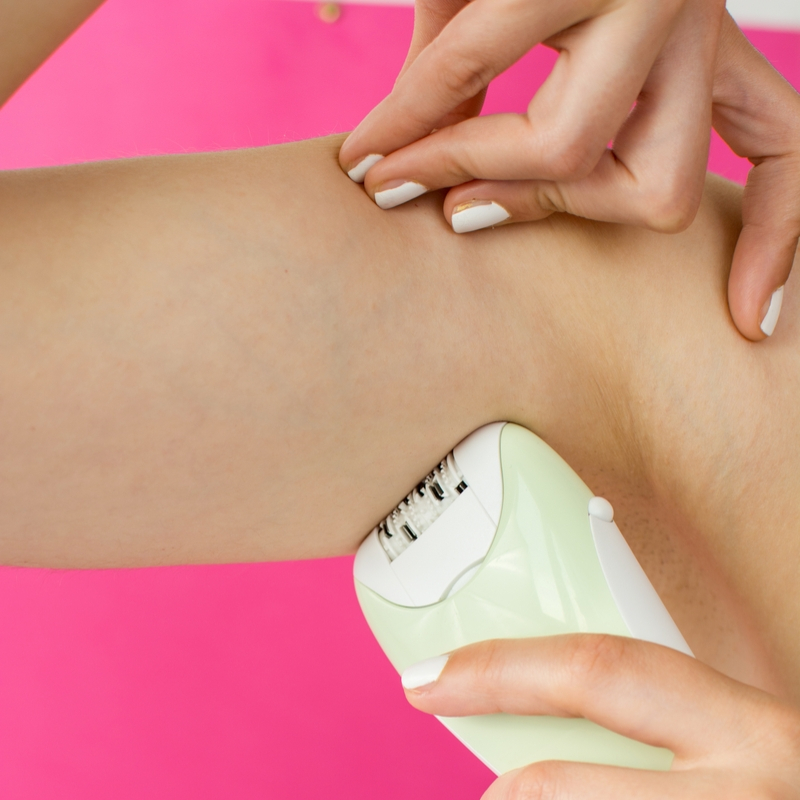
    Since then, I’ve tried many other methods of hair removal for facial hair. I finally settled on plucking my eyebrows and using an epilator on my upper lip. I still have hairs on my cheeks, but they are light colored and since I don’t wear make up, they don’t really bother me.

    I love using an epilator because it is even faster and cheaper than Nair. The only drawback for me has been ingrown hairs, but exfoliation tends to prevent them.

    If you’re more interested on my thoughts about epilaton and facial hair, I wrote a blog post about that here.

    Want to remember this? Pin this to your favorite Pinterest board so you can find it later!

  • How Long Does Nair Last? The Longest Lasting Hair Removal Methods

    How Long Does Nair Last? The Longest Lasting Hair Removal Methods

    Being the lazy person I am, I love a hair removal method that takes a while before hairs start growing back. This is how I ended up looking into Nair for my own hair removal needs.

    So how long does Nair last before hair grows back? Nair hair removal cream works by dissolving hairs above and just below the surface of the skin. This means that Nair lasts a little longer than shaving – so about two to five days, depending on how fast your hairs grow.

    If two to fives days bums you out, because you’d like to remove hair less often, skip ahead for my list of the hair removal methods that last the longest. There are other methods that may suit your lifestyle better than Nair or other depilatories.

    How Long Does Nair Last Before it Expires?

    Most Nair products, including their hair removal creams, have no expiration date, so technically they should work safely for years. However, Nair recommends that you replace your Nair product one year after it is opened.

    To help the product keep longer, store in a cool, dry, and well ventilated area, out of direct sunlight.

    Flashback to 1985. I love these old kitschy beauty product commercials!

    How Does Nair Hair Removal Work?

    Depilatory creams like Nair work by using chemicals that break down hair structure.

    Nair contains three active ingredients Potassium Thioglycolate, Calcium Hydroxide, and Sodium Hydroxide.

    These chemical break the bonds of keratin, the protein that make up hair. Then hair and the root is turned into a jelly like substance through a chemical reaction known as hydrolysis.

    Both calcium hydroxide (slaked lime) and sodium hydroxide (lye) are alkaline, with a PH of about 12. Hair destruction requires a PH of 10, so they do the trick rather efficiently.

    However, these substances are really harsh on the skin, so to keep the amount of hydroxides to a minimum, potassium thioglycolate is usually the main ingredient in chemical depilatories, including Nair products.

    Once these chemicals are done working, the hairs are now a soft goo basically, that simply has to be wiped wway with a cloth.

    Some Nair products also contain Urea, which helps to exfoliate skin.

    Ingredients like mineral oil, lanolin, or argan oil are added to Nair to help counterbalance the harsh chemicals and soften skin.

    19 Pros and Cons of Nair Hair Removal Cream

    Before you take the plunge with Nair, here’s a definitive list of all the pros and cons. Hopefully they can help you decide if Nair is right for you.

    Pros

    Easy and Do-it-Yourself

    One of the best things about Nair is that it doesn’t take a lot of skin to do well. Just read the directions and get at it. This is great if you prefer not going to a salon and want an easy hair removal method to do at home.

    Saves Time

    It’s a fast method — all you gotta do is apply, wait 3-10 minutes, rinse, and BAM! you’re done. Since it removes hair almost to the root, it takes longer to grow back than shaving, so you will spend less time on hair removal compared to shaving.

    No Cuts

    No razors mean no cuts, which is a plus clumsy folks like me.

    No In-Between-Days

    With waxing and many other hair removal methods, you need to grow out hair a little bit before it will work. Not so with Nair. Since it works to remove hair under the skin, you can use it as soon as you begin to see that dark shadow.

    Not as Painful as Other Methods

    Unlike methods like epilation and waxing, you won’t be pulling hair out by the roots, so you’ll save yourself from that kind of severe pain.

    Inexpensive

    A bottle of Nair costs around $5-10. If you are just using this on your legs, it could last several months. This is way cheaper than buying fancy razors, for sure.

    Super Soft Skin

    Since Nair removes hair below the surface, you won’t have stubble growing back almost immediately. Additionally, Nair products contain extra moisturizers that usually leave skin super silky and soft.

    No More Razor Burn

    If razors leave unsightly bumps on your skin, Nair may be a better option. Since there is no friction going on, it won’t irritate skin in the same way as razors do.

    No More Exfoliation

    Nair depilatories are designed to exfoliate the skin while also removing hair. This saves you a step and may help prevent ingrown hairs.

    Cruely Free

    Nair products are never tested on animals, so you can use them with a clean conscience.

    Easy to Buy

    Nair products can be found online at Amazon (click here to see the wide selection) or in tons of brick and mortar stores including Walmart, Target, CVS, and Walgreens.

    Products for Different Needs

    Nair has several different products designed and many are tailored to specific areas of the body. For legs, arms, and stomach area, you can use the body lotions. If you are a woman, there is specific formulas for female facial hair and the bikini area. And then there is a line of products specifically for men.

    Cons

    The Smell

    Have you ever smelled someone getting a perm? It staaannkkks! Nair uses some of the same chemicals and it has a similar odor. They do try to cover it up with fragrance, but there is no covering up that smell completely.

    Side Effects

    The most common side effect of Nair hair removal cream is skin irritation and pain. Other adverse effects include allergic reactions, chemical burns, ingrown hairs, and skin darkening.

    For a full list of possible side effects from using chemical depilatory creams, including Nair, read my post on hair removal cream side effects.

    Patch Test

    Due to the potential side effects and the possibility of having an allergic reaction, you need to do a patch test each time you use Nair.

    Why? Because your immune system is constantly changing and you can randomly develop an allergy to the chemicals in Nair, even if you’ve been using it for years.

    Sensitivity

    An increase in skin sensitivity is a side effect of prolonged use that many people experience. This may mean that your skin becomes irritated more easily or that it gets dried out easily by the chemicals in Nair.

    Frequency

    Although you don’t need to use Nair as often as you need to shave, it still doesn’t remove hair from the root as well as other methods. So you will need to do it more often than methods like waxing or epilating.

    72 Hours Between Uses

    Nair recommends that you wait 72 hours between applications. If you use it more often in the same area, you may end up with a chemical burn or develop an allergy to chemicals in the product.

    This is only a problem if you mess up somehow and don’t get all your hair removed from an area you used it on.

    If that doesn’t happen, 72 hours is no big deal since you shouldn’t need to remove hair with Nair more than once or twice a week.

    The 24 Hour Wait

    After using Nair, you should wati 24 hours before apply other products like lotions ,deodorant, or perfumes ot the same area.

    You should also wait 24 hours before getting a lot of sun exposure as your skin will be more sensitive and likely to burn.

    Which Hair Removal Method Lasts the Longest?

    Any hair removal method that removes hairs from the root will last anywhere from one to six weeks, depending on how well it’s done, your hair’s texture and color, and how fast your hair grows.

    Realistically, you will probably have to get touch ups at least every two weeks with any of these methods. Still, two weeks is significantly better than every few days!

    The main downside with all these methods is pain. Pulling hairs out by the root hurts.

    Also, if these methods aren’t done correctly, they will simply break the hair off at the surface and you’ll see those hairs pop back up again in just a few days. So taking the time to learn the method well and do it right will pay off.

    So what are the methods that remove hairs from the root?

    Tweezing

    This is pretty self explanatory. You can use tweezers to remove hair from your eyebrows, but it won’t cut it for larger areas of hair.

    Waxing

    Waxing is done by applying warm wax to your hair, letting it cool, then pulling it off quickly. This rips out the hairs that dried in the wax. If done well.

    Waxing can be done by a professional at a salon, ensuring you get it done correctly. Or if you’re on a budget, wax kits can be bought for use at home too.

    Sugaring

    Sugaring works similar to waxing, but a sugary paste is used instead of wax. Some people like it better than waxing because it doesn’t remove the top layer of skin like waxing does.

    Sugaring is most commonly done at home with both store bought and DIY pastes.

    Threading

    Usually reserved for eyebrows, threading uses strings to grab and pull out hairs. It takes some skill to do well, so is best done by a professional. And allthough it makes your eyebrows look fabulous, it tends to be more painful than other methods.

    Laser

    Laser hair removal uses heat from, you guessed it, lasers. This heat damages hair follicles, slowing or stopping growth completely.

    Laser can sometimes be done at home, but is usually best left to a well-trained professional. However, no matter who does it, it only works in a small percentage of people (usually people with light skin and dark hairs) and it isn’t guaranteed to be permanent.

    Electrolysis

    Technically, electrolysis is the hair removal method that lasts the longest. If you want a hair removal method that lasts forever, electrolysis is your best bet. It’s the only FDA approved method for permanent hair removal.

    This method uses electricity to destroy the hair follicle. If you find a well trained electrolysis, it may last forever. Unfortunately, though, no method is perfect for everyone. Electrolysis doesn’t work in about 5-10% of the population.

    Epilation

    Epilation is tweezing on steroids. It’s done with a small machine called an epilator. It has tons of tweezers that work together at once to pluck hairs out.

    Epilation can be done at home and is one of the most inexpensive hair removal methods. If you can’t afford laser or electroylsis, this is the next best thing, in my opinion.

    To learn more about epilation, check out the Epilator FAQ and Beginner’s Guide.

    Want to remember this? Pin this to your favorite Pinterest board so you can find it later!

    References

    Chemical Technology of Cosmetics; Kirk-Othmer; 2013

    U.S. National Library of Medicine: Nair Cream Hair Remover for Face with Baby Oil

    U.S. National Library of Medicine: Nair Hair Remover Precision Face and Upper Lip Kit

    U.S. Food and Drug Administration: Removing Hair Safely

    The Indian Journal of Surgery: Shaving Versus Depilation Cream for Pre-operative Skin Preparation

  • How to Grow Eyebrow Hair Back Fast: The Ultimate Guide

    How to Grow Eyebrow Hair Back Fast: The Ultimate Guide

    I can’t tell you how many times I’ve over plucked or misapplied wax to my brows, leaving myself with lopsided or pencil thin eyebrows. If this has happened to you, I can imagine the regret you are feeling right now!

    Thankfully, there are several ways to speed up eyebrow hair growth and soon this will all be in the past!

    So how to grow eyebrow hair back fast? The best way to grow eyebrow hair back quickly is to use an oil that stimulates hair growth or an eyebrow growth serum. Apply either the oil or serum daily for 8 to 16 weeks or until your eyebrow hair has grown back completely.

    Read on to learn about the best oils to use and which eyebrow growth serum I recommend.

    Castor Oil

    Castor oil is typically used as a laxative, but this versatile oil is also packed full of proteins and fatty acids. There hasn’t been studies on castor oil for hair growth, but many natural beauty proponents swear by it’s hair stimulating effects.

    Although there isn’t solid evidence on it’s effects, a study has confirmed that it increases the luster of hair which improves appearance. So it’s worth a try if you’re on a tight budget. You can find it at any grocery or drug store and it’s super cheap, at only a dollar or two per bottle. The downside is that it can irritate skin in some people.

    To see if castor oil is okay for your skin, do a patch test by applying a drop in an area like the back of your hand. Rub it in and wait to see if irritation occurs. If after several hours, your skin is still fine, you should be good to go.

    For brow growth, try rubbing a drop into brows and let it sit for 30 minutes. Then gently cleanse brows with your usual facial cleanser and rinse thoroughly.

    Olive Oil

    Olive oil is all natural and packed with vitamins A and E, which have been linked to hair growth. In some studies, olive products have specifically been linked to improved hair growth as well.

    This oil is natural, inexpensive, and easy to find in any grocery store. Ideally, organic extra virgin olive oil is best. The main downsides? Olive oil can cause acne and it doesn’t smell great.

    To use, just take a drop or two and gently massage into your brows up to several times a day. It may take up to 10-20 minutes of massaging for the oil to be thoroughly absorbed by your hair and skin. If too much oil remains on your eyebrows, gentle dot them with a towel to wipe excess oil off.

    Coconut Oil

    If the odor of olive oil is too much for you, coconut oil might be a better fit. It is full of fatty acids that improve texture and prevent breakage. It works by penetrating hair shafts so well that water is not easily absorbed. Wet hair is weak hair, so it is less likely to break after a coconut oil treatment.

    Just like olive oil, you can use any coconut oil in the grocery store. However, my favorite coconut oil for skin and hair care is Fractionated Coconut Oil by Sky Organics because it’s less greasy and doesn’t go rancid as quickly.

    Coconut oil can be applied to eyebrows the same way as olive oil: just massage a tiny amount into your brows up to several times a day.

    Coconut oil is usually better for oily skin than olive oil and may be better for acne-prone skin as well.

    Aloe Vera

    There is no direct evidence that aloe vera improves hair growth. However, it does increase circulation when applied to the skin, which theoretically may help with hair growth.

    The main advantage of trying aloe vera gel over the other oils listed is that it will be less likely to cause acne breakouts.

    If you have an aloe vera plant, you can get gel by simply breaking a leaf in half and squeezing some gel out. Then store the leaf in the refrigerator. You can buy aloe vera leaves at some Indian grocery stores as well. Or you can buy aloe vera gel on Amazon.

    To use for hair growth, just massage a drop into your brows once a day.

    Eyebrow Growth Serum

    Although oils are cheap and easy to find, eyebrow growth serums are simply amazing. They protect your eyebrows from breakage and stimulate growth, so your brows may be back in business as quickly as eight weeks.

    The downside is the cost, typically ranging from $30-150 per container. If you can handle that price tag, it’s well worth it if you want better looking eyebrows quickly.

    Although there are tons of eyebrow growth serums on the market, I recommend RevitaBrow Advanced Eyebrow Conditioner (click here to check out all the reviews on Amazon, many include before and after photos).

    This serum is cruelty free, vegan, and hypoallergenic. It contains peptides and lipids that stimulate hair growth, strengthen hairs, and enhance shine and appearance. It also contains prostaglandin, which helps to darken light hairs, making brows look fuller and healthier.

    Tips for Using Products to Grow Eyebrow Hair Back Fast

    • Avoid getting products or oils in your eyes. If you do, flush your eyes with water immediately.
    • Massaging the oils will work best if you use your fingers, but if you prefer, you can use a cotton swab instead.
    • If any product causes redness, irritation, or acne breakouts, stop using and try another one out.

    What Hair Growth Products to Avoid

    There are quite a few other suggestions on internet for how to grow eyebrow hair back fast or just speed up hair growth in general. I’ve looked into the claims behind many of these ideas and found that they either have no evidence or they have too many potential side effects to make them worth while. Here are a few I would pass on:

    Petroleum Jelly

    There is no evidence that it works for hair growth. This wouldn’t be so bad since it’s cheap, but it’s not a natural product and it causes acne in a lot of people. Therefore, I recommend skipping this.

    Onions

    There is one small study linking onion juice to hair growth. But until there is more peer reviewed studies proving that onion juice will make hair grow back more quickly, it’s definitely not worth smelling like an onion for weeks or months, in my humble opinion.

    Turmeric

    I’ve seen some websites that suggest putting turmeric on hair to stimulate growth. Ummm…do you want orange eyebrows? Because this is how you get orange eyebrows.

    Egg Yolks

    The hair growth benefits of eggs come from eating them, not applying them on your hair. Raw eggs can contain bacteria and are just gross, so I wouldn’t recommend putting them on your eyebrows.

    Lemons

    There is no evidence that this speeds up hair growth. And squeezing lemons close to your eyes is a bad idea.

    Other Ways to Boost Hair Growth

    Reduce Stress

    Stress wrecks havoc on the body and this affects hair growth as well. If you are under a lot of stress, take steps to manage it better. Some quick solutions may be as simple as getting some more rest and taking time to do yoga or mediation.

    If stress is overwhelming, talking with a therapist or getting regular massage are great ways to take care of yourself (and the effects on your hair and health will be worth it).

    Eat Well

    Make sure you eat a well balanced diet, getting plenty of nutrients. Reduce sugar and processed foods. Some foods are especially good for hair growth, so try to include them in your diet each day:

    Fish

    Fish contain omega 3 fatty acids which have been linked to hair growth in some studies. To get the highest quality oil, eat wild caught fish. My favorite is wild caught Alaskan Salmon. It’s packed with healthy oil, but also low in mercury.

    Eggs

    Eggs are packed with protein, zinc, selenium and other hair-stimulating nutrients including biotin. Your hair is made up of a protein called keratin. And biotin is the nutrient that is necessary for keratin production. So if you’re not getting enough biotin, your hair growth will be impacted.

    Nuts and Seeds

    Nuts and seeds are a tasty, easy way to get lots of high quality nutrition in your diet. They contain B vitamins, vitamin E, zinc and essential fatty acids. These are all necessary for healthy hair growth.

    The best part is that you can pack them in your purse and keep them on hand for a quick, healthy snack, ensuring that you are getting some healthy nutrition each day without any prep work.

    Fruits

    Most fruits contain antioxidants like Vitamin C. Antioxidants fight free radicals, those rogue molecules in your body that can damage hair follicles.

    If you want the best bang for your buck, berries, including blueberries and strawberries, have more antioxidants than most other fruits.

    Spinach

    Spinach is loaded with nutrients linked to hair growth, including vitamins A and C, iron, and folate. Get some in your day by adding it to a salad or sauteing a bunch in some olive oil for a side dish.

    How Long Will This Take?

    The hair growth cycle for eyebrows takes about four months total. But hair growth speed varies widely between people depending on a lot of factors, including genetics and age.

    Some people can grow out brows as quickly as eight weeks, especially if they take extra steps to make the eyebrow hair grow back faster.

    If your eyebrows seem to be taking forever to grow back or are thinner than they used to be, you may want to talk to your doctor to rule out any underlying health issues. Autoimmune disorders, anemia, thyroid disease are examples of medical conditions that can slow hair growth.

    However, if you’ve over plucked your brows for years, some of those hairs may never grow back completely. The hair follicles can become damaged after plucking for years and eventually, they don’t produce new hair.

    If this is the case, you may need to embrace thin eyebrows or try some tricks to make them look fuller.

    How to Make Eyebrows Look Fuller

    While you’re waiting for your eyebrows to grow back (or if you’ve given up on them), there are still a few things you can do to make your eyebrows look more appealing.

    Make Up

    You can tune up your brows pretty easily with just a brow pencil and some brow powder.

    Start by brushing your brows, then use the brow pencil to draw a border around your brows, then color inside of the border.

    Finish up by brushing brow power over the pencil marks, starting from the inner side of your brow near your nose and finishing on the other end of the brow.

    Microblading

    If you want the full eyebrow look without using make up every day and have a big budget for just for eyebrows, microblading may be for you.

    Microblading is a tattoo technique that leaves a semi permanent marks that mimic the look of eyebrow hair. Many women who have over-plucked their eyebrows for years have turned to microblading to make their eyebrows look fuller and have been happy with it.

    The downside is the cost, ranging from about $350 to $800.

    Final Takeaways

    You have a lot of options for how to grow eyebrow hair back fast. Unfortunately, growing your eyebrows back completely may still take a few months, but you can get quicker results if you use hair stimulating products, eat well, and manage your stress better.

    My fave eyebrow growth hack is using eyebrow growth serum, which tends to work well for most people and can give you good results within eight weeks.

    Want to remember this? Pin this to your favorite Pinterest board so you can find it later!

    References

    Biochimica et Biophysica Acta: Endogenous Retinoids in the Hair Follicle and Sebaceous Gland

    Brazilian Journal of Microbiology: Isolation, Purification and Evaluation of Antibacterial Agents from Aloe Vera

    Experimental Biology and Medicine: Dietary Vitamin A Regulates Wingless-Related MMTV Integration Site Signaling to Alter the Hair Cycle

    Journal of Cosmetic Science: Optical Properties of Hair

    The Journal of Dermatology: Onion Juice (Allium cepa L.), A New Topical Treatment for Alopecia Areata

    PLoS One: Topical Application of Oleuropein Induces Anagen Hair Growth in Telogen Mouse Skin

    Skin Appendage Disorders: A Review of the Use of Biotin for Hair Loss

  • Does an Epilator Cause Ingrown Hairs? Epilators and Ingrown Hair

    Does an Epilator Cause Ingrown Hairs? Epilators and Ingrown Hair

    Hair removal and ingrown hairs go hand in hand, unfortunately. One of the biggest drawbacks of using an epilator is the possibility of getting ingrown hairs. Since this is such an important topic for epilator users, I researched the topic thoroughly to get a good understanding of the problem and the best ways we can address it. This post breaks down the causes of ingrown hairs and how to prevent ingrown hairs when epilating.

    What is an Ingrown Hair?

    An ingrown hair is a hair that gets trapped under the skin when it is growing out. These usually look like a breakout of pimples or you may see hair bumps with black dots under the skin. Obviously, you are epilating because you care about your appearance so you want to avoid these.

    The Causes of Ingrown Hairs

    Does an epilator cause ingrown hairs? Unfortunately, an epilator can potentially cause ingrown hair. All hair removal methods may cause ingrown hairs. This can happen when a hair follicle becomes damaged and the hair starts growing sideways or curls and grows back toward the bottom of the follicle. This is most likely in people with curly hair and happens pretty infrequently, fortunately.

    The most common cause of ingrown hairs, however, is dead skin cells getting in the way. With epilation, the main issue is that the tips of the new hairs growing back are finer and therefore can have more difficulty getting through the skin, especially if there is a build up of dead skin inside or on top of the follicle.

    Tactics for Preventing Ingrown Hairs

    To prevent ingrown hairs from epilating, you need to make sure that dead skin cells are thoroughly sloughed off on a regular basis. You can do this with either physical or chemical exfoliation methods.

    Physical methods of exfoliation include facial scrubs or microdermabrasion. They work by using friction to rub off the dead skin cells.

    Or you can use chemical exfoliation products such as peels or lotions. These remove dead skins cells by speeding up cell turnover. Beta hydroxy acids are a great choice for preventing ingrown hairs from epilating because they reach deep into the skin and follicle.  They also have antibacterial properties, can reduce inflammation, and have anti-aging effects.

    You may want to try both to see which gives your skin the best results. I prefer using physical exfoliation right before epilating, but use chemical lotions between epilating to prevent ingrown hairs.

    Are You Prone to Ingrown Hairs?

    Some people are just more prone to ingrown hairs in general than other people. And some people are just prone to ingrown hairs with certain types of hair removal. And some body parts in some people are more prone to ingrown hairs.

    And this is particularly a challenge when epilating more noticable areas like arms or the face because no one wants to wake up one day with a chin full of ingrown hairs. And you just can’t know if you have a tendency to have ingrown hairs from epilating until you try it.

    So if you’ve never epilated before, I highly recommend trying out a small patch of hair on your leg and waiting a few days to see how it goes before epilating a large area of skin.

    If you get an ingrown hair, experiment with some different exfoliation methods and routines. Try epilating a tiny patch again to see if your exfoliation method worked. If you don’t see good results, epilation may not be the best method for you, unfortunately.

    Treating Ingrown Hairs

    If you are cursed with an ingrown hair from epilating, here re some treatment recommendations from the National Health Service in the UK:

    • Leave it alone for a few days to see if it goes away on its own.
    • If it’s near the surface, use a sterile needle or tweezers to remove it.
    • Don’t dig into the skin to try to remove a hair. Don’t pick, scratch, or squeeze your skin as this can cause infection and wounds. That could mean scars and skin discoloration that you don’t want.
    • If there is inflammation, try applying a mild antiseptic like tea tree oil.
    • If these steps don’t help resolve the problem and the ingrown hair doesn’t go away, contact your health care provider for advice. They may have to remove the hair for you or prescribe you antibiotics for an infection.

    Have more questions about epilation? Check out the Epilator FAQ and Beginner’s Guide!

    Want to remember this? Pin this to your favorite Pinterest board so you can find it later!

    References

    National Health Service: Ingrown Hairs

  • How to Use an Epilator (Ultimate Guide for All Epilators!)

    How to Use an Epilator (Ultimate Guide for All Epilators!)

    So you’ve finally bit the bullet and bought an epilator? Woohoo! You are probably both excited and nervous about trying it out the first time, but don’t worry, it’s really pretty simple. I learned how to epilate from a lot of trial and error and have a lot to say on this subject.

    However, to make sure you are starting out on the right footing, I sat down and read through the manuals of all the most popular epilators to gather all the important info a new user should know before trying out their first epilator. In this post, I have tried to summarize it all as well as possible so you don’t have to read a crap ton to know how to use an epilator.

    What You’ll Need to Epilate

    • Your epilator
    • Batteries or epilator charger
    • Headband or hair ties to keep your hair out of your face
    • Facial cleanser
    • Exfoliation scrub or mitt
    • Clean, dry towel
    • Rubbing alcohol
    • Epilation numbing cream or other products for pain relief (optional)
    • Mirror in a well-lit room or a mirror with a light attached to it
    • Moisturizing cream
    • Ice pack for pain (optional)

    Before You Use an Epilator for the First Time

    Woman brushes hair out of epilator head with small brush in one hand and epilator in the other hand.
    Use the brush that came with your epilator to clean hairs out of the head before each use.
    • Consider different ways you can keep it as pain free as possible, which I wrote about in this post.
    • Read your manual. Don’t miss the safety warnings and make sure you know how to operate your specific device properly.
    • Check batteries. Either charge your epilator fully or make sure you have batteries for it on hand.
    • Start in the evening. Ideally, you should epilate at night so that any irritation or redness has time to subside while you sleep.
    • If epilating your face, pull hair back with a headband or hair tie to keep it out of your face. The last thing you want is to get the hair on your head caught in an epilator.
    • Wash skin well in warm water. Exfoliate.
    • If using a dry epilator, dry skin well. Even if you have a wet and dry epilator, overall, hairs are easier to grab when they are as dry as possible.
    • If your skin is not too sensitive or dry, apply alcohol to thoroughly disinfect it. This will help avoid breakouts from epilating as well as prevent infections.
    • Make sure your epilator head is thoroughly clean. Use rubbing alcohol to disinfect it as well.
    • If you are using skin numbing cream, apply it at this time and wait for it to completely dry before you start epilating.

    During Epilation

    A woman holds an epilator in one hand to epilate underarm. She uses second hand to pull her skin taut.
    Pull skin taut so it doesn’t get caught in the epilator and the tweezers and grab hairs better.
    • If you have multiple attachments, choose the best one for the body part you are starting with.
    • Turn on your epilator to the lowest setting if this is your first time. Once you are used to epilating, you can try a higher speed.
    • To get used to the epilator, start on your lower legs. If you are just epilating face, start on the outer edges of your mouth or on your chin.
    • Use one hand to stretch skin while the other holds the epilator at a 90-degree angle. To stretch the skin around your mouth, you can press your tongue against your lip or cheek area.
    • Move the epilator slowly against the direction of growth. If hairs are not being pulled, turn the epilator around and see if that works better. If you aren’t holding it correctly and moving in the right direction, it won’t work.
    • Move the epilator around your skin slowly and steadily. If it isn’t working well, move it in different directions as hair growth is often in different directions.
    • Use gentle pressure the whole time. Too much pressure against your skin can cause cuts and other injuries.
    • If you notice that hairs or breaking instead of being pulled out by the root, make sure you are using the lowest speed and move your epilator more slowly.

    After Epilating

    Lotion on skin helps to moisturize and soothe it.
    Don’t forget to moisturize skin after epilating.
    • Apply a moisturizing cream after you epilate to soothe, relax, and soften skin.
    • If the skin is really irritated or sore, you can apply an ice pack for about 10-15 minutes to help with pain and reduce inflammation
    • Clean your epilator according to your manufacturer’s instructions. Usually, this involves using a brush to get all the hair out and then applying rubbing alcohol. Cleaning your epilator after each use will help it perform better, last longer, and prevent skin infection or breakouts.
    • If this is your first time epilating, then plan to do it again in a week. Do it weekly for about a month to help your skin adjust. You’ll find that discomfort decreases each time. Once you’ve got the hang of it, you can just epilate once every three weeks or as needed.

    Epilating Tips

    • If you’ve never epilated before, try out a patch on your lower leg before other areas to see how painful it is. This is usually one of the least painful areas to epilate, so if you can’t handle the pain, you may want to skip your face or bikini area altogether.
    • If you are worried about pain, take a non-steroid anti-inflammatory like acetaminophen about 30 minutes before you start epilating.
    • To prevent spreading germs, causing gross breakouts and infections, never share your facial epilator with other people.
    • If your skin is irritated or broken, don’t epilate there.
    • Never epilate near your eyes unless you want to go blind. Never try to epilate your eyelashes. Not only would you look weird without eyelashes, but that’s also dangerous.
    • You can epilate a unibrow between your eyebrows if you have a Braun Face, Gillette Face Perfection, or another small facial epilator designed for that, but don’t try to shape your eyebrows with an epilator. None of them are designed for that. One wrong move and there goes half your eyebrow and then what are you going to do?
    • If your epilator head ever becomes damaged, don’t use it. It is dangerous and could cut you.
    • If using a battery-powered epilator, replace batteries as soon as you notice that power is decreasing. This will ensure you get the best results.

    Related Questions

    When epilating legs, I get ingrown hairs. What can I do about this? 

    Ingrown hairs are a complex topic, which I dive into in a post you can read here. However, to answer your question quickly, the best way to prevent ingrown hair is to exfoliate, exfoliate, exfoliate.

    How can I epilate without pain?

    The best way to epilate without pain is practice! Once you get used to using a epilator, it barely hurts, if it hurts at all. My long list of tips on epilator pain can be found here.

    Have more questions about epilation? Check out the Epilator FAQ and Beginner’s Guide!

    Want to remember this? Pin this to your favorite Pinterest board so you can find it later!